Feels like lost the overview?

Do you know this feeling: you have a lot of documents, calculation spreadsheets or photos, and you slowly run out of the disk space on your PC? You have some copies but you have no time to sort it out and also can't imagine to accidentially lose any genuine file. Well, that is exactly the case, where duduplicator can help you to safely identify and reclaim waisted disk space.
Download
Features overview:
- SQLite personal database keeps both scan result and taken decision.
- Smart file comparison leads to ultra fast search results.
- Repetative scans utilize early gathered file information that boosts file comparison.
- Clear, simple and non-distracting user interface.
- Powerful automation rules may significantly reduce manual effort.
- Export search results in CSV, TXT or BAT file format.
Settings
 On this register tab you can set up directories to scan and define appropriate file patterns.
To select the directories to scan there are a few options: You can navigate to the directory on the left panel and choose by clicking the boxes.
You can also navigate in the file explorer outside the program to the particular directory and then drag and drop it onto the right panel into the suitable area.
The last option is to type the directory path and file patterns directly into the list. To complete the setup and start the process click the
scan and compare button and provide the database's file name for saving the configuration and gathered file information.
The equality of files will be checked via hash sums of the files' content. By default the MD5 hash function will be used.
If you prefer a stronger hash method you can activate the Use strong hash function checkbox and choose from SHA-256, SHA-384 or SHA-512 hash methods.
Be aware: that stronger hash methods are significantly slower and you can't change it later for the particular database. In general the app trys to reduce the calculation effort,
so if you do the deduplication ony once and you don't have multiple removable media, you can safely deactivate the Keep file information for removable media checkbox.
Otherwise full hashes will be calculated for files located on removable media and this information will be used later to identify duplicate files on off-line media.
So you can put the first CD in the driver, complete the scan and then change the CD in the driver and repeat the scan again for the next CD. If you want to calculate all files'
hashes for a regular driver, you can select action Catalog X: in the Split-button.
Overall status
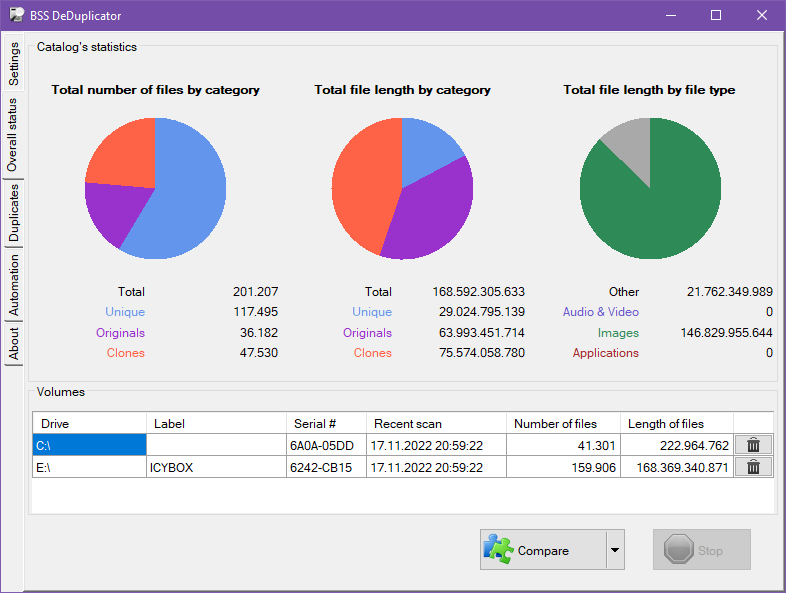
 This register tab provides you an overview of the current scan status and gives you an useful indication of the attainable result.
The blue part of the pie chart indicates unique files. Such files exist only once and won't be touched by the programm.
The purple part of the chart indicates files that have at least one copy.
The red part of the pie represents clones, which may waste space of your drive and can be removed.
This register tab provides you an overview of the current scan status and gives you an useful indication of the attainable result.
The blue part of the pie chart indicates unique files. Such files exist only once and won't be touched by the programm.
The purple part of the chart indicates files that have at least one copy.
The red part of the pie represents clones, which may waste space of your drive and can be removed.Usually you don't want to see duplicate files on the offline media such CDs or USB if they are not participated in the last scan - this is the default behaviour. If you like to see all the duplicate files found on all media you can choose Compare all in the split button on this register tab.
Duplicates
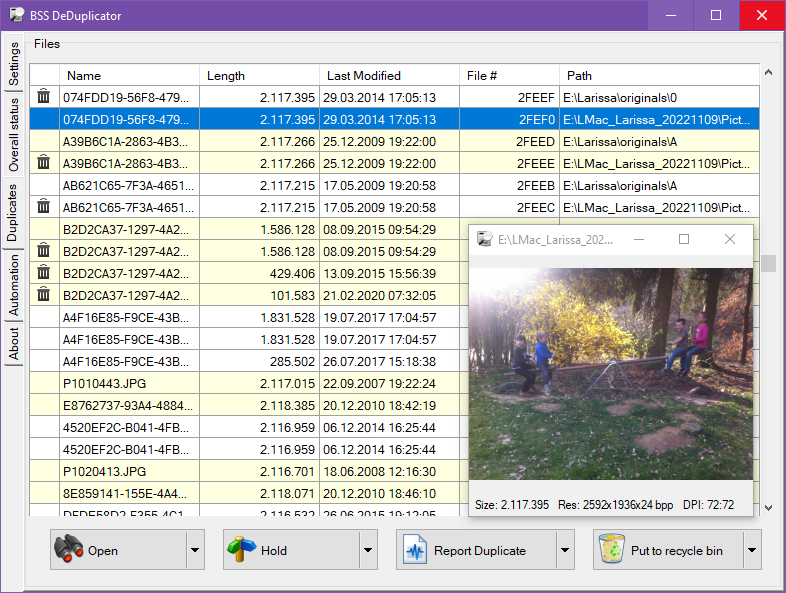
 On this register tab the duplicated files are listed in colored groups. Files with the same content found one single group,
regadles of their names or directory they belong to. The groups are listed in order of amount of wasted space that can be freed up.
You can review file groups and mark particular files by pressing SPACE to delete.
All files stay in place as long you don't push the Put to recycle bin or the Remove button.
You will probaly spent most of the time making your decision on this register tab and therefore there are a few useful keyboard shortcuts:
- F2 open image file in integrated viewer
- F3 open file in default application
- F4 open folder containing the file
- F5 remove all marks from the file
- F6 mark file to be deleted
- F8 mark files to be replaced by hard link
* - this action requiores multiple selection and can only by applied on volumes with NTFS - SPACEBAR togle file deletion mark
Automation
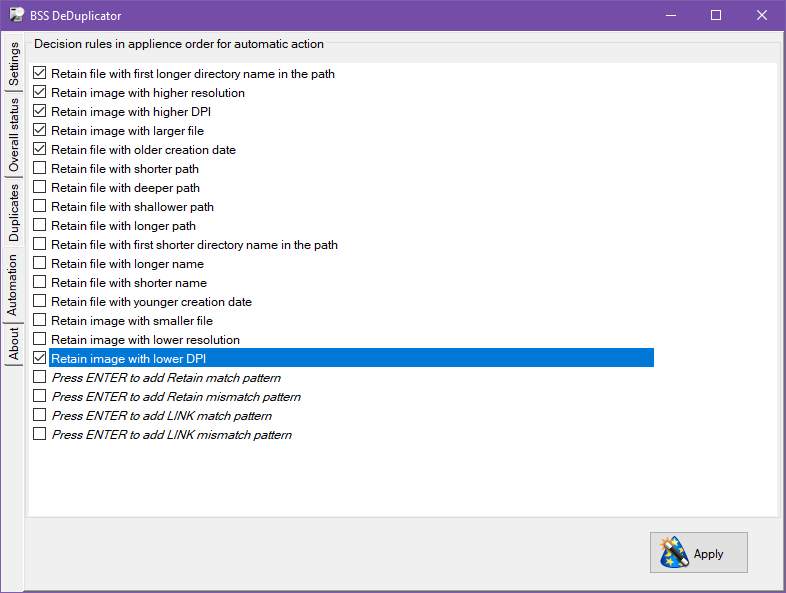
 Some times you can automate file section by applying some rules to the files in the same group.
On this register tab you can choose and put the rules in the appropriate order via drag and drop
or pressing / on the keyboard. You can also define file name patterns for the prefered file selection.
All files within a group with the highest rank will remain and all the other files within the group will be marked for removal.